12 Tips for Improving Portrait Lighting
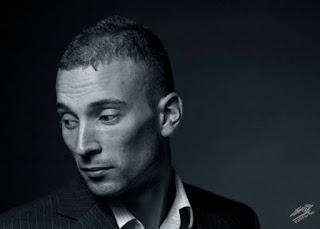
Lit with a Rosco 24 inch Litepad HO in the foreground and Speedlite on the background.
One of series of test shots for a new lighting workshop on 29th January 2011.
1. To improve your techniques and get better at your craft you must practice, practice, practice and then practice some more.
2. Previsualise what you are going to shoot and plan the lighting before you start. I use rough sketches to plan my lighting. Don't be too ambitious. You can see examples here on my blog http://ianpack.blogspot.com/2010/12/lighting-tutorial-hati-chan.html I strongly recommend only one or two shots a session. This way your model will not get bored and you'll be able to keep track of what you are shooting. See 3 below.
I keep a note book purely for lighting and photography.
3. Be analytical and critical of the images you create. Keep a record of what works and what does not. I use a Moleskin notebook http://www.simplymoleskine.com as they are the perfect fit for my camera bags or pockets. Others use spreadsheets to record the data. Personally, a notebook is more spontaneous. You may also want to shoot a few wide shots of the set-up - much quicker than a sketch.
4. Set a time limit before you start and try to keep to it. This may mean either setting up your lights before the session, which is good practice, or even rehearsing before the day without a model.
Test shot for my Capturing the Male Form Workshop, 29th January 2011.
5. Buy a dummy. Sometimes I work with Fred http://ianpack.blogspot.com/2010/10/coloured-studio-backgrounds-with-rosco.html a polystyrene head I bought from a shop fittings supplier http://1stforfittings.co.uk/ The advantage with Fred is he doesn't take breaks and whine about how long you are taking! Fred is fine for head shots, but you really need either a full or half-bust/torso dummy for longer shots.
Generally these polystyrene heads are white. All you need to do to make one look realistic is buy some water based emulsion paint testers from the local hardware or DIY store. Most of these are provided with their own brush.
6. When working with your model communicate clearly what you want them to do. If you are recreating an image, have a copy available and show your model.
7. Great images are about team work. Working in isolation can stifle creativity. Involve your model, maybe another photographer, make-up artist and hair stylist. Bounce ideas off one another. Working with another photographer gives you a VAL - Voice Activated Light Stand which is quicker than messing around with extending stands and sand bags. This is a task that can be shared.
8. If there is a group of you, make it into a social event;-)
9. If you are working indoors make sure the the "studio" is warm and maybe have some music playing to lighten the mood.
10. Don't forget to thank your model and team.
A team photograph is a good idea
24 inch Rosco Litepad HO on the pebbles just in front of the group
with a 12 x 6 inch Litepad HO rear left to separate the dark clothing from the sky
11. Make sure the model and team get a few prints or even a CD with a few images.
12. If you do intend posting the images to a photo sharing or social networking website, make sure that the model is in agreement with this before you start the session.


Comments
Post a Comment